Introduction
Hey there! I often find myself explaining Git from the ground up, so I decided to write this short introductory guide as a handy reference. This guide will walk you through the very basics. By the end of this post, you’ll know how to set up your first repository, make your first commit, and more. Let’s get started!
I can’t recommend enough having a playground local repository so you can test each command. You should be able to freely move around your repository noticing how each command changes the current state of your files and the commit history.
Setting Up Your First Git Repository
First things first, let’s set up your Git repository. This is where your project’s history will live.
To create a new Git repository, open your terminal and navigate to your project’s directory. Then, run:
git init
This command sets up a brand new Git repository in your project folder. Easy, right?
After running git init, a hidden .git directory is created. This directory contains all the necessary metadata and objects that Git uses to track and manage your project’s history.
Adding Files to Your Repository
Next, let’s add some files to your repository.
Think of the staging area like a shopping cart—you gather changes here before you check out (commit). To add a file, use:
git add <file_name>
Replace <file_name> with the name of your file. The <file_name> is now on staging area. The staging area lets you review and prepare changes before committing them.
If you want to add all changes in the current folder (including deletions and modifications), you can use:
git add .
To see what’s in your staging area and what’s changed in your working directory, use:
git status
This command gives you a summary of the current state of your project.
Committing Your Changes
Now, let’s commit your changes. A commit is like a snapshot of your project at a specific point in time.
To commit your changes with a message, use:
git commit -m "Your commit message"
Make sure your message is clear and descriptive so you know what this commit is about later.
Visualizing Your Commit History
Seeing your commit history can be very helpful.
To visualize your commit history, use:
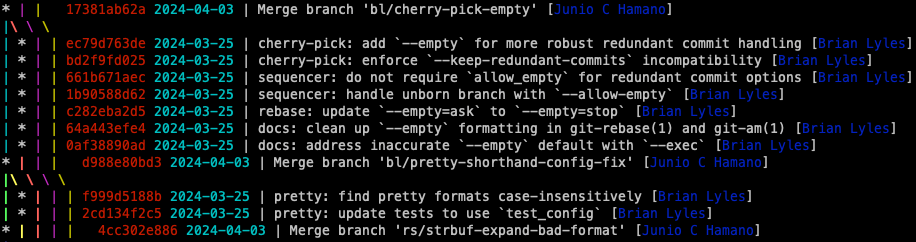
git log --graph --all --oneline
This command shows a graphical representation of your commit history, which can be really useful for understanding how your project has evolved.
Pushing Changes to a Remote Repository
Once you’ve made some commits, you might want to share your work with others or back it up to a remote repository like GitHub.
First, you need to add a remote repository. If you’re using GitHub, it might look like this:
git remote add origin https://github.com/yourusername/your-repo.git
Then, push your changes:
git push origin main
This command uploads your changes to the main branch of your remote repository.
Understanding the Git Mindset
To really make the most of Git, it helps to get familiar with how it works and the key parts of your project from Git’s perspective: the filesystem, the staging area, and commits. This workflow is all about how changes move through Git until they’re safely recorded in your project’s history.
-
Working Directory (Filesystem): When you modify files in your project, you’re working directly in the filesystem. This is where you create, edit, and delete files. At this stage, these changes are not yet tracked by Git.
-
Staging Area: After making changes, you add the modified files to the staging area using the
git addcommand. Think of the staging area as a clipboard for changes—it’s where you prepare what will be included in your next snapshot. This step allows you to control exactly which changes are part of the next commit. -
Commit as a Node in the Tree: When you’re ready, you use
git committo take a snapshot of the staged changes. This snapshot acts like a node in Git’s version history, forming a connected structure. Each commit points back to its parent, creating a sequence of changes rather than separate folders. A branch is simply a pointer to one of these sequences, not a container of its own. By focusing on how changes flow through the tree, you can navigate Git more effectively and understand its true power.
A common mistake when thinking about Git is to see branches as if they were folders, but this mindset can be misleading. Instead of focusing on individual branches as separate containers, it’s better to see Git as a tree of changes—where each commit is a node and branches are just pointers to different sequences of snapshots.
Conclusion
And that’s it! You’ve just taken your first steps with Git. You now know how to set up a repository, add files, commit changes, push to a remote repository, and understand the basics of how Git works. Keep practicing these commands, and soon you’ll be a Git pro!
Remember, where Git is used, there is always hope. With Git, you can rewind changes, recover past versions of your code, and even undo mistakes with ease. It allows multiple developers to work on the same project and it’s the best way to share code with others.
Additional Resources
If you want to dive deeper into Git, check out these resources:
- Official Git Documentation
- GitHub Guides
- Julia Evans’ blog – I can’t recommend it enough! Intuitive explanations of Git commands and internals.
- Tools for visualizing your Git commit history, like Sourcetree or GitKraken.